A Single-Screen Workflow Application in WPF
December 15, 2013
I have set myself the goal of learning how to develop a Windows user interface with a moderately complex workflow, one that implies a Wizard-like set of screens to guide the user through a set of steps. The demonstration project's architecture will utilize the Model-View-ViewModel (MVVM) pattern, with the help of Caliburn.Micro (CM) [nice tutorial]. The solution will utilize the Application Controller pattern and CM's Conductors.
ApplicationController and State Management
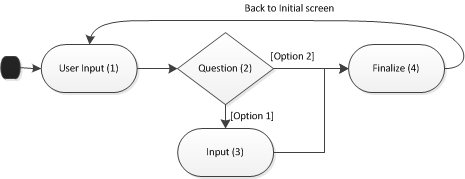
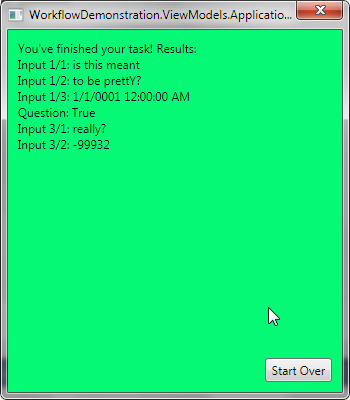
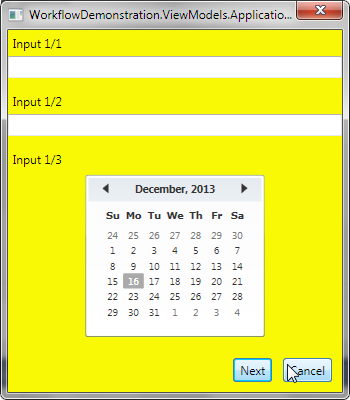
The state diagram above depicts a simplified workflow: the application starts, user enters input, answers a questions, optionally enters more input, finalizes the action, and returns to the initial screen. Martin Fowler describes this pattern of user interface design as an Application Controller, and describes when to use it: "If the flow and navigation of your application are simple enough so that anyone can visit any scren in pretty much any order, there's little value in a Application Controller. The strength of an Application Controller comes from definite rules about the order in which pages should be visited and different views depending on the state of objects." (Patterns of Enterprise Application Architecture, p 381, Application Controller)."
The state machine implies some way to manage session state – in this case, I'll let the controller manage the state via a POCO called WorkflowState, with fields that correspond to those used in each screen. Each transition in the state machine implies the passing around of a WorkflowState object.
public class WorkflowState
{
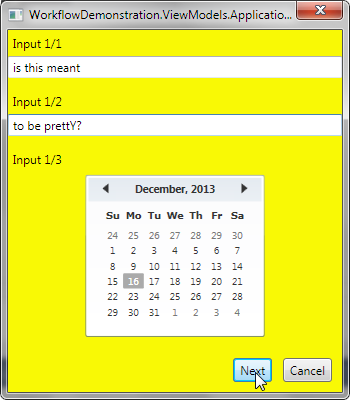
public string Input1Field1 { get; set; }
public string Input1Field2 { get; set; }
public DateTime Input1Field3 { get; set; }
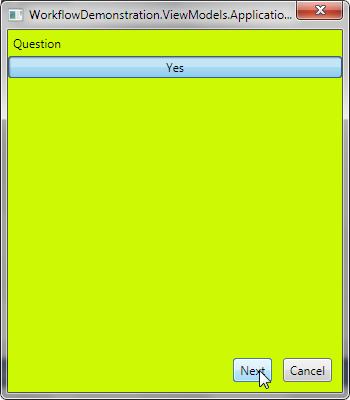
public bool Question1 { get; set; }
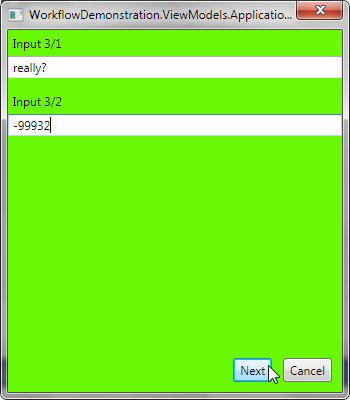
public string Input3Field1 { get; set; }
public int Input3Field2 { get; set; }
public string FinalizeResults { get; set; }
}
But what will the state transitions look like in code? One approach would be a set of if statements that inspect the current state and decide which state to pursue next. Alternately, as suggested by Fowler, we can leverage a map. His example uses strings and commands for a web application, which are not appropriate in this case. Here, we need to have a map of classes: for class A, transition 1 leads us to class B, and transition 2 leads us to class C. There are a number of possible solutions, but let's use a nested Dictionary, similar to Fowler's use of HashMap, and encapsulate it in a Singleton collection class. Careful use of generics on the Singleton helps guide future developers by enforcing the type of objects that can be stored in the Dictionary (IScreen being the obvious choice for a screen/control in Caliburn.Micro). Further, the states will be given by an enum called StateTransition. The transitions in this enum should have more evocative names in a real system, describing the transition.
public class TransitionMap : Dictionary<Type, Dictionary<StateTransition, Type>>
{
	private static TransitionMap m_instance;

	private TransitionMap() { }


	public static TransitionMap GetInstance()
	{
		if (m_instance == null)
		{
			m_instance = new TransitionMap();
		}
		return m_instance;
	}


	public static void Add<TIdentity, TResponse>(StateTransition transition)
		where TIdentity : IScreen
		where TResponse : IScreen
	{
		var instance = GetInstance();

		if (!instance.ContainsKey(typeof(TIdentity)))
		{
			instance.Add(typeof(TIdentity), new Dictionary<StateTransition, Type>() { { transition, typeof(TResponse) } });
		}
		else
		{
			instance[typeof(TIdentity)].Add(transition, typeof(TResponse));
		}
	}

	public static IScreen GetNextScreen<TIdentity>(StateTransition transition)
	{
		var instance = GetInstance();
		var identity = typeof(TIdentity);

		if (!instance.ContainsKey(identity))
		{
			throw new InvalidOperationException(string.Format("There are no states transitions defined for state {0}", identity.ToString()));
		}

		if (!instance[identity].ContainsKey(transition))
		{
			throw new InvalidOperationException(string.Format("There is response setup for transition {0} from screen {1}", transition.ToString(), identity.ToString()));
		}

		return instance[identity][transition] as IScreen;
	}
}
Implementing with Caliburn.Micro
Undoubtedly, there are a number of ways to accomplish this with Caliburn.Micro (CM), and the method presented here might not be the best one. At this time, I have focused on learning how to utilize CM's Conductors to create the workflow. Before going any further, you might want to read Caliburn Micro Part 6: Introduction to Screens and Conductors.
What's missing from the tutorial linked above is an explanation of how to close one screen and move to another. The simplistic approach is to implement Conductor<object> and activate one screen in the deactivation of another (event handler on Deactivated). But, "the activation of each new item causes both the deactivation and close of the previously active item," according to the official documentation.
Thus activation inside of deactivation re-triggers the original deactivation, and an infinite loop / StackOverflowException ensues. The Conductor<IScreen>.Collection.OneActive is a better, in fact correct, choice. Using an event handler is still possible, but that will leave the screen logic scattered through a series of functions. Is there a single place where we can put a simple script the defines the screen flow? The solution is found in this entry from the same documentation:
"When an item is closed and that item was the active item, the conductor must then determine which item should be activated next. By default, this is the item before the previous active item in the list. If you need to change this behavior, you can override DetermineNextItemToActivate."
You can use DetermineNextItemToActivate to build up a logic chain, moving from screen to screen. In other words, we can use it for implementing Application Controller. Thus, let's (a) define the screen changes using TransitionMap and (b) setup DetermineNextItemToActivate to use the same. The code that loads the TransitionMap naturally should go into the constructor.
private void initializeMap()
{
	TransitionMap.Add<Input1ViewModel, Question2ViewModel>(StateTransition.Input1Success);
	TransitionMap.Add<Input1ViewModel, Input1ViewModel>(StateTransition.Cancel);

	TransitionMap.Add<Question2ViewModel, Input3ViewModel>(StateTransition.Option1);
	TransitionMap.Add<Question2ViewModel, Finalize4ViewModel>(StateTransition.Option2);
	TransitionMap.Add<Question2ViewModel, Input1ViewModel>(StateTransition.Cancel);

	TransitionMap.Add<Input3ViewModel, Finalize4ViewModel>(StateTransition.Input3Success);
	TransitionMap.Add<Input3ViewModel, Input1ViewModel>(StateTransition.Cancel);

	TransitionMap.Add<Finalize4ViewModel, Input1ViewModel>(StateTransition.Cancel);
}


protected override IScreen DetermineNextItemToActivate(IList<IScreen> list, int lastIndex)
{
	var theScreenThatJustClosed = list[lastIndex] as BaseViewModel;
	var state = theScreenThatJustClosed.WorkflowState;

	var nextScreenType = TransitionMap.GetNextScreenType(theScreenThatJustClosed);

	var nextScreen = Activator.CreateInstance(nextScreenType, state);

	return nextScreen as IScreen;
}
The Rest of the Demonstration Code
And there you have it: clean, easily-maintained, expandable, object-oriented code for a WPF wizard-like interface. Download the complete application from GitHub.
No TrackBacks
TrackBack URL: http://www.safnet.com/fcgi-bin/mt/mt-tb.cgi/116

Nice work
Hi,
I tried to download the sample code, but two files failed (Insert1View.xaml, Insert3View.xaml). Maybe you can send me a .zip with the sample code.
THANKS A LOT.
With best regards
Gerhard
Hi Gerhard, I mistakenly put in the wrong file links. Please refresh the page and you'll find the links have been corrected.